

Nest.js is a framework for building efficient, scalable Node.js server-side applications. It uses progressive JavaScript, is built with and fully supports TypeScript (yet still enables developers to code in pure JavaScript), and combines elements of OOP (object-oriented programming), FP (functional programming), and FRP (functional reactive programming).
The word “progressive” means that the framework is implemented as an additional markup to HTML. It is a template model bound to a data model. If the model is updated, the browser’s HTML is updated, i.e., it reacts to model updates.
Nest provides a level of abstraction above these common Node.js frameworks (Express and Fastify) but exposes their APIs directly to the developer. This gives developers the freedom to use the myriad of third-party modules that are available for the underlying platform.
Installation (by cloning the project from GitHub)
To get started, you can either scaffold the project with the Nest CLI or clone a starter project (both will produce the same outcome). we will clone a starter project.
$ git clone https://github.com/nestjs/typescript-starter.git project
$ cd project
$ npm install
$ npm run start
Installation NestJS ( using npm )
Before you can use NestJS to create your back-end application we need to make sure that the Nest CLI (Command Line Interface) is installed on your system. This can be done by using the Node.js Package Manager NPM in the following way:
$ npm i -g @nestjs/cli
Of course, you need to make sure that Node.js and NPM is already installed on your system. If this is not the case yet, just follow the instructions on https://nodejs.org/ to install Node.js and NPM on your computer.
Once the installation of the Nest CLI is completed the nest command will be available. You can use this command in the following way to initiate a new NestJS project:
$ nest new my-nestjs-01
Executing this command creates a new folder my-nestjs-01 in the current location and downloads the default project template into this folder.
Let’s take a closer look at the initial project structure.
Project Structure
The initial structure of the project consists of the following folders and files:
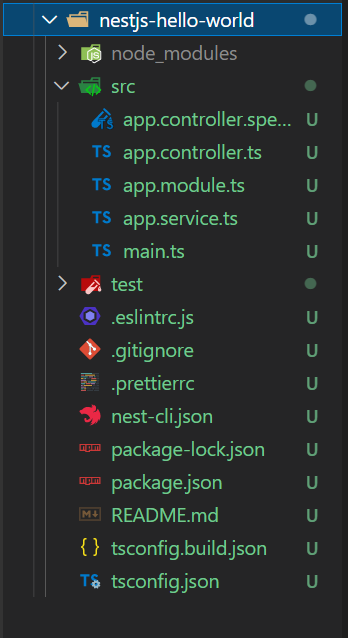
The most important folder of the project is the src folder. This is the place where you’ll find the TypeScript files which is application code inside. Later, when implementing our first example we’ll spend most of the time working in this directory.
Inside the src folder you can find five files in the initial project setup:
main.ts: Entry point of application. By using the NestFactory.create() method a new Nest application instance is created.
app.module.ts: Contains the implementation of the application’s root module.
app.controller.ts: Contains the implementation of a basic NestJS controller with just one route.
app.service.ts: Contains the a basic service implementation.
app.controller.spec.ts: Testing file for controller.
Let’s take a closer look at the code:
In file main.ts you’ll find the following default implementation:
import { NestFactory } from '@nestjs/core';
import { AppModule } from './app.module';

async function bootstrap() {
  const app = await NestFactory.create(AppModule);
  await app.listen(3000);
}
bootstrap();
This is the entry point of the application. First of all NestFactory is imported from the @nestjs/core library. Furthermore AppModule is imported from the app.module.ts file of our project.
Second, the bootstrap function is implemented and marked as async. Inside this function the NestFactory.create() method is called and the root application module AppModule is passed into that function call as an argument. This is creating a new NestJS application instance with the module attached. To start up the server the next step is to call the listen method and pass in the port on which the web server should be running, e.g. port 3000. Because the listen method is returning a promise when the server has been started successfully we’re using the await keyword here.
Finally the file contains the call of the bootstrap function, so that the code is executed.
Next let’s take a look at the implementation of the root application module which you can find inside the file app.module.ts:
import { Module } from '@nestjs/common';
import { AppController } from './app.controller';
import { AppService } from './app.service';

@Module({
  imports: [],
  controllers: [AppController],
  providers: [AppService],
})
export class AppModule {}
To declare class AppModule as a module the @Module decorator is used which is imported from the @nestjs/common library. An object with three properties is passed into the @Module decorator. The three properties are:
imports
controllers
providers
All controllers which should be part of AppModule needs to be part of the array which is assigned to the controllers property (in the initial state of the application there is only one controller which is assigned to the root module: AppController).
Services which should be available in AppModule must be listed in the array which is assigned to the providers property.
Next we’re taking a closer look at the AppController implementation in app.controller.ts:
import { Controller, Get } from '@nestjs/common';
import { AppService } from './app.service';

@Controller()
export class AppController {
  constructor(private readonly appService: AppService) {}

  @Get()
  getHello(): string {
    return this.appService.getHello();
  }
}
This is a very simple implementation of a NestJS controller which consists of just one GET route. In order to make a class a controller you need to add the @Controller decorator. This decorator is imported from the @nestjs/common library.
A controller of relies on a service class. In this default example AppController makes use of a service named AppService. AppService is being implemented in file app.service.ts and therefore a corresponding import statement needs to be added on top.
By using the concept of Dependency Injection AppService is inserted into AppController (by adding a constructor parameter of that type).
A default route is implemented by implementing the getHello method. In order to declare that this method handles a HTTP GET request the @Get docorator is added to this method. The method is using the getHello method from AppService to retrieve data and at the same time return that data as a response.
Let’s move on and see what’s inside app.service.ts:
import { Injectable } from '@nestjs/common';

@Injectable()
export class AppService {
  getHello(): string {
    return 'Hello World!';
  }
}
This file is containing the implementation of the AppService class. In order to make AppService a service class (which can be injected in a controller like seen before) the @Injectable decorator needs to added before that class. Again this decorator type is imported from the @nestjs/common package.
The service class implementation is very simple and only consists of the implementation of the getHello method. This method is just returning the static string “Hello World!”. In a real world scenario a service method would of course be used to retrieve data e.g. from database, a web service or some other data source.
Now, that’ve a first impression of the most important building blocks of the default NestJS application we’re ready to start up the server and see what we’re getting as a result.
Running The Application
To start the the server you simply need to execute the following command within the project folder:
$ npm run start
You should then see the following output on the command line:
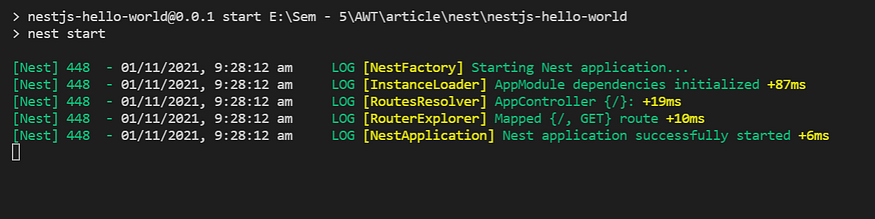
Finally you should see the message “Nest application successfully started”. This message informs you that the server is ready and you can try sending the first GET request to the default endpoint by simply using the browser and opening URL http://localhost:3000. The result can be seen in the following screenshot:

home page: hello world
No surprises here: The text which is being returned is “Hello World!”. This string is retrieved from the getHello service method and then return as a response of the HTTP GET request by the corresponding controller method.
There is another option to start up the server:
$ npm run start:dev
If you’re using the start:dev script nodemon is used to start up the server which means that all of your code files are being monitored for changed. The server is automatically restarted when changes in your source code are detected.
Now, Let’s add some code and make a CRUD operation in NestJS.
Github code Link : https://github.com/jatanbhimanii/CRUD-operation-using-Nestjs/tree/main/nestjs/soc_mp
Step 1: Edit the main.ts file.
main.ts
import { NestFactory } from '@nestjs/core';import { AppModule } from './app.module';declare const module: any;
async function bootstrap() {const app = await NestFactory.create(AppModule, {cors: true});app.listen(5000).then(() => {console.log("successfully stared on port 5000");}).catch((error) => {console.log(error);})}bootstrap();
Step 2: Install typeorm and make a database.config.ts file in src/config folder.
$ npm install — save @nestjs/typeorm typeorm pg
src / config / database.config.ts
import { PostgresConnectionOptions } from "typeorm/driver/postgres/PostgresConnectionOptions";

export const devConfig: PostgresConnectionOptions = {
  type: 'postgres',
  host: 'localhost',
  port: 5432,
  username: 'postgres',
  password: '1234',
  database: 'AWT',
  entities: ["dist/**/*.entity{.ts,.js}"],
  synchronize: true,
}
Step 3: Make a Todo.entity.ts file in src/entity folder.
src / entity / Todo.entity.ts
import { Entity, Column, PrimaryGeneratedColumn } from 'typeorm';

@Entity('Todo')
export class Todo {
  @PrimaryGeneratedColumn()
  id: number;

  @Column()
  name: string;

  @Column({ default: false })
  complete: boolean;
}
Step 4: Make a todo.controller.ts file in src/controller folder.
src / controller / todo.controller.ts
import { Body, Controller, Delete, Get, Param, Post, Put, Req } from '@nestjs/common';
import { Request } from 'express';
import { TodoInterface, TodosService } from 'src/provider/todo.service';interface CreateTodoDto {
  name: string,
  complete: boolean
}@Controller('cats')
export class TodosController {constructor(private todosService: TodosService) {}@Post()
  async create(@Body() createTodoDto: CreateTodoDto) {
    const todo = await this.todosService.create(createTodoDto);
    if(!todo) {
      return 'error in creating todo'
    }
    return 'todo created successfully'
  }@Get()
  async findAll(@Req() request: Request) {
    const cats: Array<TodoInterface> = await this.todosService.findAll()
    return cats
  }@Put(':id')
  async update(@Param('id') id: string, @Body() body: any) {
    const newCat: any = await this.todosService.update(id, body)
    return "cat updated";
  }@Delete(':id')
  async remove(@Param('id') id: string) {
    await this.todosService.delete(id)
    return "cat deleted"
  }
}
Step 5: Make a todo.service.ts file in src/provider folder.
src / provider / todo.service.ts
import { Body, Injectable } from '@nestjs/common';
import { InjectRepository } from '@nestjs/typeorm';
import { Todo } from 'src/entity/Todo.entity';
import { Repository } from 'typeorm';export interface TodoInterface {
  name: string,
  complete: boolean,
}@Injectable()
export class TodosService {
  constructor(
    @InjectRepository(Todo)
    private todoRepository: Repository<TodoInterface>,
  ) {}create(todo: TodoInterface): Promise<TodoInterface> {
    return this.todoRepository.save(
      this.todoRepository.create(todo)
    );
  }findAll(): Promise<TodoInterface[]> {
    return this.todoRepository.find();
  }update(id: string, data: any): Promise<any> {
    return this.todoRepository
    .createQueryBuilder()
    .update()
    .set({
      name: data.name
    })
    .where('id = :id', { id })
    .execute()
  }delete(id: string): Promise<any> {
    return this.todoRepository
    .createQueryBuilder()
    .delete()
    .from(Todo)
    .where('id = :id', { id })
    .execute()
  }
}
Step 6: Make a todo.module.ts file in src/module folder.
src / module / todo.module.ts
import { Module } from '@nestjs/common';
import { TypeOrmModule } from '@nestjs/typeorm';
import { Todo } from 'src/entity/Todo.entity';
import { TodosController } from '../controller/todo.controller';
import { TodosService } from '../provider/todo.service';@Module({
  imports: [TypeOrmModule.forFeature([Todo])],
  controllers: [TodosController],
  providers: [TodosService],
})
export class TodosModule {}
Step 7: run the project.
$npm run start:dev
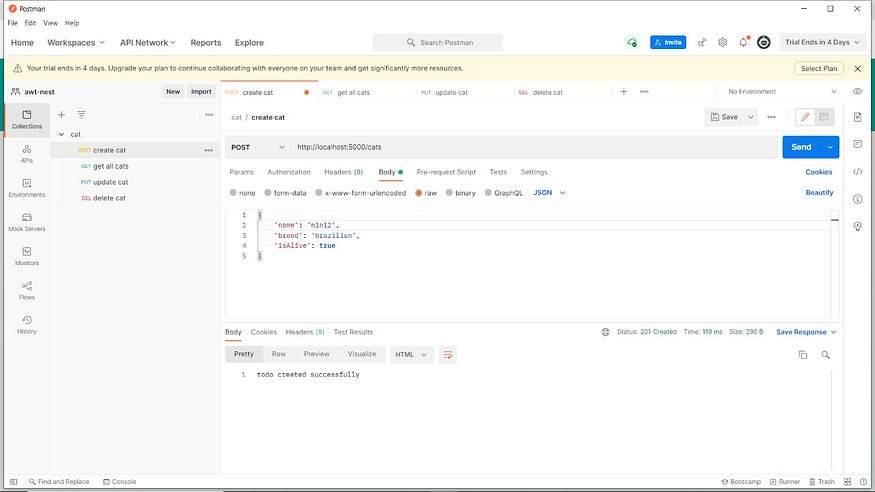
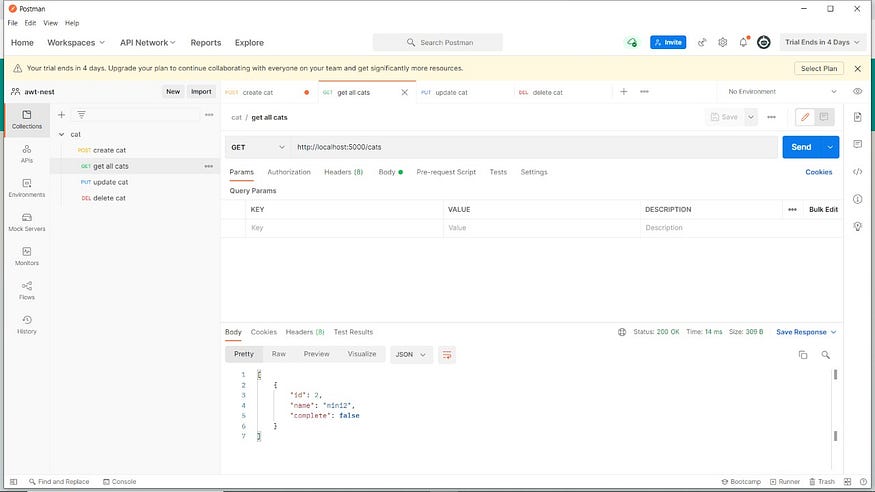
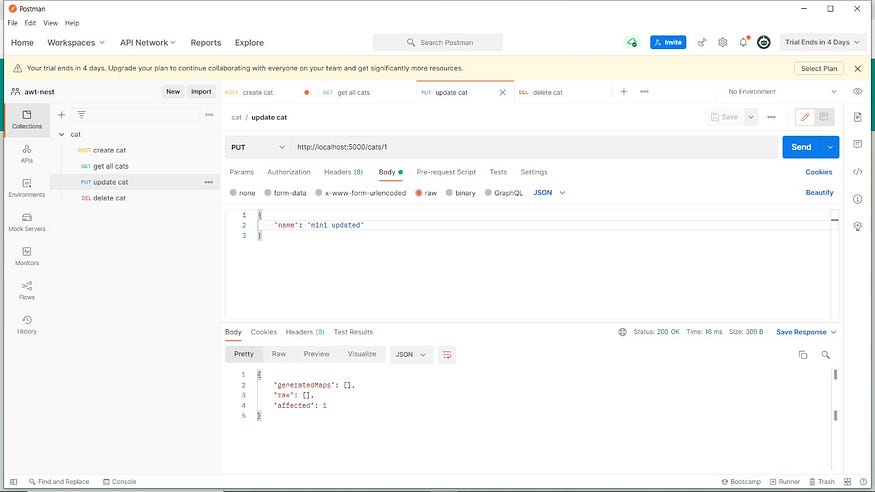
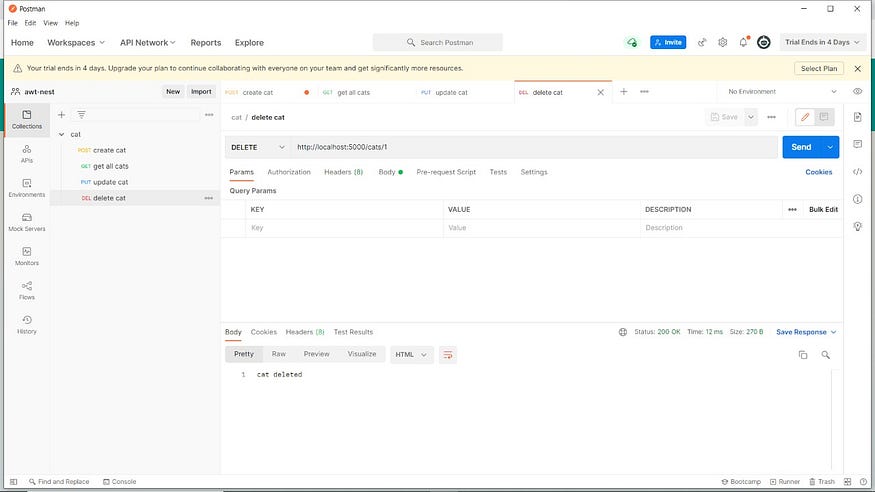
Testing the Endpoint With Postman